The CryptKi Guides
How to set up a wallet (software & hardware)
At some point, you realise something simple.
If you want to use crypto properly, you need a wallet. Not an account on a platform. Not an app that works like a bank. A wallet. Something you control entirely.
So you download one, or you buy a device. You open it, and you're asked to "create a wallet". This is where it often becomes confusing.
Nothing looks difficult. The steps seem straightforward. But what you are doing at that moment is not trivial. You are creating the only access to your funds.
There is no customer support to call if something goes wrong. No password reset. No second chance.
In this guide, we'll walk through what actually happens when you set up a wallet, how it works in practice, and what mistakes to avoid from the start.
👉 If some terms feel unclear, start here first:
Before you install anything: verify the source
Before downloading a wallet, go directly to the official website or verified app store page. Do not install a wallet from a link received by email, message, social media, or an advertisement.
Step 1. Choosing and installing the wallet
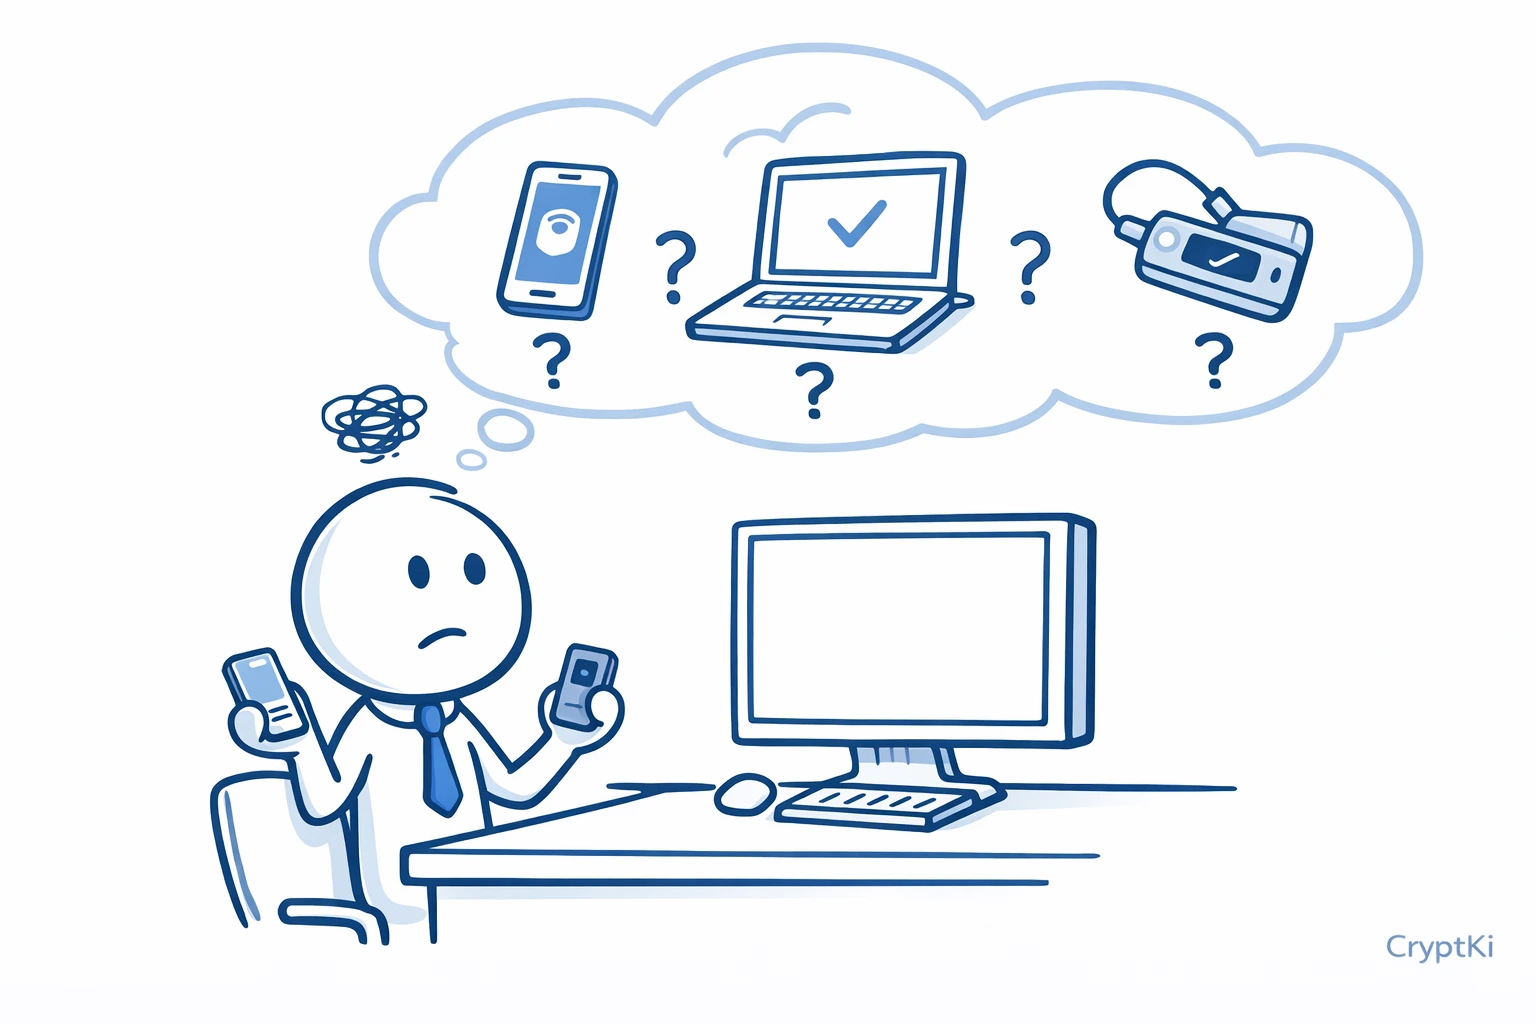
The first step is simple: install the wallet. But this is already a decision.
Not all wallets support the same blockchains or assets. Some are designed for a specific ecosystem, while others support multiple networks. Your choice should match what you plan to use.
In practice, you can choose a mobile app, a desktop wallet, or a hardware wallet, which is a physical device. Mobile wallets are the easiest to start with. Hardware wallets require both a physical device and a companion software installed on your computer.
A hardware wallet adds a physical layer between your keys and your computer. The overall logic remains the same, but the setup and usage involve an additional device.
Example: you install a wallet from the App Store, or you plug a hardware wallet into your computer and open its setup application. At this stage, always follow the official instructions provided by the manufacturer.
If you use a hardware wallet, initialize it as a new device following the manufacturer's official instructions. Never use a device that already comes with a seed phrase.
⚠️ This step matters more than it looks. If you install the wrong application, a fake app or a phishing link, everything that follows can be compromised from the start.
👉 Simple rule: always go through the official website or verified app stores. Never trust a link sent to you by someone else, even if it looks legitimate.
👉 If you're unsure which wallet to choose:
→ What is a crypto wallet?
→ Types of wallets (hot, cold, multisig, custodial)
→ Which crypto wallet should you choose?
Step 2. Creating the wallet
Once installed, the wallet ill ask you to create a new wallet or restore an existing one. Here, you choose "create".
In practice, it looks very simple. You tap a button and follow a short setup process. No email required. No account to create.
Example: you open the app, tap "Create wallet", and follow the steps.
What you don't see is that the wallet is generating your keys in the background. This happens automatically, in a few seconds.
⚠️ At this moment, everything depends on your device. If your device is already compromised, your wallet may be compromised before you even start using it.
Step 3. Writing down the seed phrase
This is the most important step of the entire process, and also the one most often done incorrectly.
The wallet will show you a list of 12 or 24 words. This is your seed phrase, also called your recovery phrase.
In practice, you are asked to write it down, then confirm some or all of the words to make sure you recorded it correctly.
It may feel like a formality. It is not.
This list of words is the only way to recover your wallet. Anyone who has it can access your funds. From anywhere. On any device. If you lose it, access is permanently lost.
Common mistakes at this stage include taking a screenshot, saving the words in a notes app, storing them in the cloud, or sending them by email. These actions may feel convenient, but they silently increase exposure.
Most wallets recommend storing it offline. What matters is understanding that whoever has these words has full control.
👉 To go deeper on this:
→ How to manage your seed phrase (backup, test, compromise)

Step 4. Setting a PIN or password
After the seed phrase, the wallet usually asks you to set a PIN on mobile, or a password on desktop.
This often creates confusion.
You set a 6-digit PIN, and it feels like your wallet is now secured. In reality, this PIN only protects access to the app on your device. It does not protect your funds.
If someone has your seed phrase, they don't need your PIN. They can restore your wallet on another device and access everything.
⚠️ PINs and passwords protect the access to the app. The seed phrase protects access to your funds. These are two different things.
Step 5. Understanding what you see in the wallet
Once setup is complete, the interface looks familiar. You see a balance, a "Send" button, and a "Receive" button.
It feels like a bank app.
This is where a common misunderstanding appears. Your crypto is not inside the wallet. The wallet only displays what exists on the blockchain. It lets you send, receive, and confirm transactions.
This becomes important the day you change phone or lose your device. The app may disappear. Your funds don't, as long as you still have your recovery phrase.
Later: what "connect wallet" actually means
At some point, you will use your wallet with a website or an application. For example, to buy crypto, swap tokens, or use certain services. This often involves connecting your wallet.
In practice, you will see options like “Connect with MetaMask”, “Rabby”, “Phantom”, or “WalletConnect”. These are different ways to link your wallet to that website or application.
Depending on your setup, your wallet may be a mobile app, a browser extension, or a hardware wallet connected through a companion application. Some hardware wallets are used through software like MetaMask or similar tools, which act as an interface.
You click "Connect wallet", approve, and it feels like logging in. It is not.
You are authorising actions. For example, you may allow a website to request transactions, or to interact with your wallet later under certain conditions.
⚠️ Before connecting your wallet, take a moment to understand what you are approving. If the request is unclear or broader than expected, it is safer to decline and investigate before approving.
👉 This is covered in more detail in:
→ How to interact with DeFi safely
Step 6. Checking your setup before using it
Before sending or receiving anything, take a moment to verify your setup.
Make sure your seed phrase is correctly written. Make sure you know where it is stored.
Then close the app and open it again. Confirm that everything works as expected.
Some wallets offer a recovery test, a way to verify that your seed phrase actually works. If available, it is worth doing early. For example, if you wrote one word incorrectly, recovery will fail, but you won't notice it until you actually need it.
⚠️ If something is wrong, it is much easier to fix now than later.
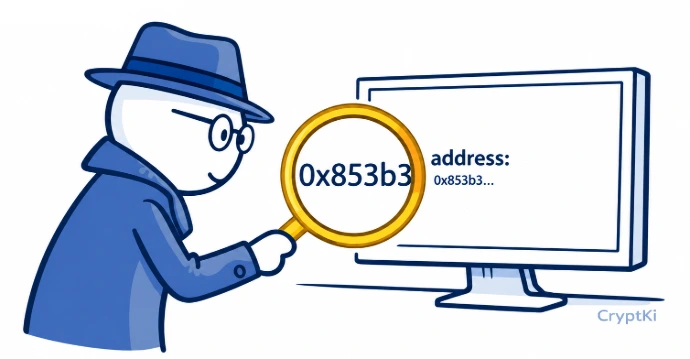
Step 7. Receiving your first crypto
Receiving is usually your first real action.
You tap "Receive", copy your address, and share it, or let the other person scan your QR code.
⚠️ Always verify the full address before sharing it. Some malware can replace a copied address silently. A quick check takes seconds and can prevent an irreversible mistake.
Using multiple addresses without confusing them
Most wallets let you create multiple accounts. Each account has a different address, but they all come from the same seed phrase.
This can help keep your activity organised and reduce what is visible on-chain. Using different addresses makes it harder to link your transactions together and estimate your total holdings.
Some wallets, especially Bitcoin wallets, generate a new address automatically for each transaction. This improves privacy by making it harder to link activity over time.
But this does not create real separation.
All these addresses are still linked to the same wallet and the same seed phrase. If the seed phrase is compromised, all associated addresses are compromised as well.
In practice, this means there are two different ways to organise your setup:
- Multiple addresses inside the same wallet: useful for organisation and privacy
- Multiple wallets with different seed phrases: required for real separation and risk isolation
How to use multiple addresses safely:
Avoid reusing the same address everywhere. Reuse makes it easier to track your activity and build a profile of your holdings over time.
Do not rely on multiple addresses for security. They are not a protection if they share the same seed phrase.
If you need true separation, create a new wallet with a new seed phrase instead of adding a new account.
👉 For a complete approach to separating usage, storage, and risk:
→ How to structure your crypto setup and reduce your exposure
Every wallet is different
The logic is always the same. The exact steps are not.
Some wallets ask you to confirm your seed phrase in a different way. Some require firmware updates. Some use different connection flows. These differences matter in practice.
👉 This guide explains what happens and why it matters. For the exact steps specific to your wallet, always follow the official setup guide provided by your wallet's manufacturer or developer. This is the only reliable step-by-step reference for your specific tool.
A final note
Wallet interfaces, blockchain tools, and platform procedures change over time. The guidance in this article reflects common practices, but your specific wallet, platform, or network may work differently.Before taking action, always verify the current steps through official documentation and trusted sources relevant to your situation.
Never rely on a single source when the consequences are irreversible.
Key takeaways
- Installing a wallet means choosing where your keys will exist
- Creating a wallet gives control. It does not create an account
- The seed phrase is the only backup. If you lose it, access is gone
- PINs and passwords protect devices, not funds
- Wallets display balances but do not store your crypto
- "Connect wallet" means authorising actions, not logging in
- Always follow the official setup guide for your specific wallet
Find out more on CryptKi Academy
-
What is a crypto wallet?
Understand what a wallet really is, how it works, and why it does not store your crypto. -
Keys, addresses, and seed phrases (basics)
Learn how keys, addresses, and recovery phrases are linked, and what they actually represent. -
Types of wallets (hot, cold, multisig, custodial)
Compare the main wallet types and understand which setup fits your situation. -
How to manage your seed phrase (backup, test, compromise)
Learn how to store, test, and protect your seed phrase, and what to do if it is exposed. -
How to send and receive crypto safely
Understand how transactions work in practice and how to avoid common and irreversible mistakes.
CryptKi Academy full index - Browse all articles
Glossary - Check the definition of all specific terms
Self-custody starts with the right setup.
Explore hardware wallets, seed phrase backups, and accessories designed to help protect your crypto access.